Showing posts with label Repurposing. Show all posts

February 28, 2013

Headboard / Footboard Bench


Hello My Blog Friends!!  I've been keeping busy, so I'm trying to squeeze in some time to share a project or two with you.  The weather here has been all over the place, so I'm trying to take advantage of each sunshine moment I can that I'm not at work to try to crank out some furniture.  I gave you a sneak peek of this bench a little while back, but never got a chance to share the details.
This piece was for a local Florida client.  She rescued this headboard and footboard from a family member who had destined it for the dump.  I know, GASP!  But, if you had seen a true before (which of course I don't have -- big surprise!), you would be more understanding.  There was VERY outdated engraving in the headboard...not the kind of engraving that you could sand out...I'm talking engraved into the wood about 1/2 an inch.  So, I took the headboard to a friend of mine to have it planed.  We shaved off a 1/2 inch of wood from the top of the headboard.  Goodbye funky outdated design!
Then, in the very end we were left with this, but I'll share how we got to this point:
 
The slats used for the original bed frame were what became the "seat" of the bench.  Building the bench will have to be another post, but I did have to solicit some assistance on this one.  Here's what it looked like when it was first transformed to a bench.

I did a lot of sanding with my orbital sander to smooth everything up.  I started with a 120 grit paper and worked up to a 220 grit before painting.  I used a dry brush technique to brush on "Alligator Green" from Benjamin Moore.  Dry brushing (this technique is explained here) uses just a little paint to give a very feathered look.

 The "Alligator Green" was followed with Graphite from Annie Sloan Chalk Paint.  This was also applied with a dry brush technique.

After all of the painting, I sanded it some using 220 grit, just to help everything blend well.

Here's another before and after glimpse:

 This piece was going to be used on a patio by my client for an outdoor table, so I gave it three coats of polyurethane once the paint dried.

It's not shown in this picture, but we also added some vintage casters to this piece to it would be easy to move around on the patio.


Thanks for visiting.  Be sure to like the JUNKtion's Facebook Page.  We will be having a give-away if we can reach 300 likes!!!

Linking up to these great parties:


Photobucket

July 19, 2012

Ammo Box Desk / Table

Hey Friends!  I wished I was here to tell you that's it's been sunshine and good painting weather here in the Sunshine State.  Unfortunately, this is not true.  My garage is filled to the brim with projects that are sanded and waiting to be sprayed.  Using my sprayer is not my absolute preferred painting method for no other reason that I get great satisfaction and enjoyment from painting by hand.  But the sprayer does make a welcomed appearance when I have multiple pieces at the same time, getting the same color (and it also helps to use the sprayer when I have chairs with a million spindles).   Point being, however, the weather has not cooperated.

So instead I've been working at the thrift shop, going through the files in our home office, getting my teeth cleaned at the dentist, quoting a couple paint jobs, and other randomness.  I was able to squeeze in a couple smaller, less tedious projects recently.  Actually, Mr. JUNKtion squeezed this one in for the most part.  He was the brains and the builder behind it.  He built a piece that would serve great as a desk or a sofa table.  It's a one of a kind piece built from wooden ammo cans.  Has a bit of a rustic/industrial feel to it in my opinion.

 We have a lot, and by a lot, I mean A LOT of these empty ammo boxes.  How do we have them you ask? Well, let's just say the hubby shoots a lot.  Should the zombies attack, I think we'll be sufficiently prepared to fight back.  We may or may not have a small armory in our house.  We'll just called it preparedness.  But preparedness is a good thing when you can use it's remnants to make furniture, right??  Let's just go with it!
 The piece we are using for the top here was none other than another roadside junk treasure.  I just really love me some good junk.  Actually, it appeared to be part of a completely falling apart desk.  This turned out to be the only salvageable piece.  You know it's bad when the Smalling's actually throw it out!
 We stacked two ammo cans on their sides and glued, nailed, and screwed them together, and then attached the top.
 I then did some sanding to smooth it up a bit.
Next up, it was time to consult the stain shelf and rag box.
  The top was stained with Provincial and the base (ammo boxes) were left natural.
 I absolutely loved the way it turned out.  I really wanted to keep this one for my house, but didn't have the perfect place for it.
 I hope someone else loves it as much as we do!
Here's a peek of this piece in my new space at Plethora (58 Carson Drive, Fort Walton Beach, FL):

Linking up here:


Primitive and Proper


{Primp}

July 17, 2012

Farm / Harvest Table

Hey Blog Friends!!  Today, I'm trying to finish up some indoor things since it's pouring outside and I can't do the painting that I need to.  I worked this morning, so I'm just now getting to start my day.  So, I'll leave you with a little teaser.  Here's a little farm/harvest table that my amazing hubby whipped up.  Isn't he so good?  The answer is yes! I'll share details, colors, and how-to's soon!


May 29, 2012

Upcycled Table and Some New Signs

Wouldn't it be really cool if I could have some creative titles for my posts?  I agree.  It would be really cool.  Unfortunately, my creative juices do not flow in that direction very often...hence the plain ol' title.

I finally did it...I gave in to the peer pressure.  I joined Pinterest.  Hopefully, I don't give in to the addiction that I hear it causes.  Either way, I'm moving forward with the times.  

Today was pretty productive.  I ran this morning, worked at the base Thrift Shop most of the day, and worked in the garage for the rest of the afternoon and evening (I'm tackling my own dining room table).  I really want a harvest table, but we've sold all the one's that the hubby has made and now he's too booked to fit me into the upcoming schedule. :(  Well, he's fitting me in, just not taking many building requests!  Now, this evening, the little puppy and I are working at cleaning up my office.  I should probably say I'm working on cleaning it and he's shedding his hair behind me, thus negating my efforts.

Speaking of efforts...here's a recent project that required basically no effort.  It was an old sewing machine base and a piece of butcher block.  I screwed the butcher block onto the base from the underside.  Easy project? Check.  Fast project? Check. Super cute table? Check.  Winner in my books!  Winner winner chicken dinner!


 Also, here's a quick picture of some new signs now available in my booth at Smith's.  I just got these down there yesterday.  That was after I fought all of the Memorial Day traffic to get there...ugh!  Oh well, hopefully they will be a big hit and it will all be worth it.

Linking here:

Primitive and Proper


May 27, 2012

Barnwood Mirror Makeover

Hello Everyone and Happy Memorial Day Weekend.  I am so thankful for my husband who serves this country with his service and dedication to the Air Force.  I am also thankful for my grandpaw, father-in-law, grandpaw-in-law, and countless other men and women who have served in the past and are serving now.  The sacrifices that each of them make and have made are tremendous.  Please take a moment to pray for the continued safety and guidance for my husband as he continues his service to our country to protect the freedoms we have.

I'm happy to report that my house/bedroom is finally coming back into some order.  I have completed the bedroom mini-makeover and will share more on that soon.  But in this post, I'm sharing how I updated my outdated mirror with a wonderful barn-wood look.  Hello gorgeous mirror!
Just so you remember...here was the atrociousness that we started with.  Enough said.

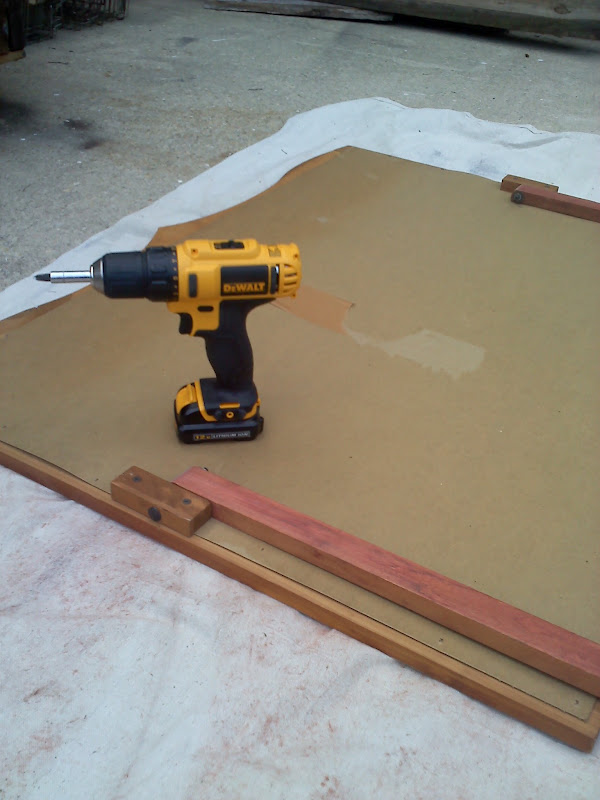
 So, I started by turning the mirror upside down on a drop cloth and removing the braces that held it to the dresser.  I wanted to protect the mirror from scratching while I did this.
 Next I went to one of my favorite places...the corner of the garage where we store all of the side-of-the-road wood treasures we have picked up.  I would be happy to have my weekly date night with the hubby here amongst all the goodness of free wood in the garage.
 So, I chose some old gray, weathered, thin fence boards.  I picked out four of them.
Next, I used the ever so perfectly cutting saw to cut the two longer ones down for the top and bottom of the frame.  I had done a rough measurement by just laying them on top of the mirror's original frame.  I cut one and tested it again on the original frame...it looked good, so I continued with the cutting.
  Here, I'm just laying it out to test everything.
 I then cut the two smaller pieces for the sides and laid them out for visual testing as well.
Then it was time to put this baby together.  I'd like to tell you that I glued it first, or used clamps to hold it in place, or measured everything, but in true JUNKtion fashion, I sorta just went at it.  I randomly placed three screws on each piece of wood.  I just screwed directly into the top of the original mirror frame.  I didn't space the screws in any particular way...I mean we're talking a barnwood look here...no such thing as perfection.  Well, actually the whole thing is perfection in my book, but you know what I mean.  I digress.
 Later, I painted over the screws with a mix of a bit of glaze and black acrylic paint that I had on hand.  That's what the black spots are below.  I think it blends in with the other knots and holes and adds to the overall look of the wood.
 I used the air compressor as a cleaning tool and removed all the extra dust and particles.  The frame got a coat of Minwax Paste Wax in Natural.  I also added to d-ring hangers and a wire to the back to hang it by.  I cannot tell you how happy I am with it.  I placed it above the recently refinished dresser (you can see that tutorial here).
Thanks for stopping by!
I'll leave you with a side by side before and after:

Linking up to these great parties:

{Primp}

Photobucket