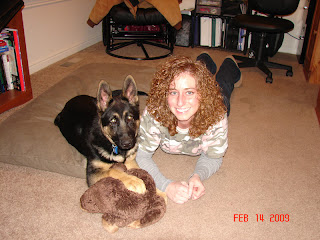
Hope your weekend was good. Mine was alright...hit some garage sales...mostly small stuff is what I came home with. Today I had to see the hubby off for six weeks. Boo. The guard dog and I will survive though! Oh, and plus I have amazing neighbors. I've already mooched dinner off of one of them tonight! :)
It's the weekend, so I'm not going to make this one too long...just a quick before and after of a dresser I just finished. This one's a little bolder than I usually go for, but I felt like shaking things up a bit!
Before:
Afters:
This one below is the truest color of the turquoise on this piece.
And the best part: painted it all with oops paints from Lowe's!! I'd say that's worth celebrating. I mean shouldn't we celebrate something every day?
Linking up here:
April 29, 2012
April 28, 2012
Color-Coded Nature Walk
Okay, for all of you with kids...here's another fun and super easy project by one of my sisters, Holly. She comes up with the best ideas for my nieces.
To get started they used an empty egg carton tray and cut out a circle of various colors that they placed in the bottom of each hole. You could get even thriftier and use paint chips for this as well.
Then they set out on their nature walk to find things in nature that matched the colors in their tray. Of course Avery is addicted to butterflies right now, so that's her butterfly net (also engineered by my sister.) Thankfully Avery lets the butterflies go after she catches them. When I was home we decided that each butterfly they catch is a kiss sent from their Noni (my Mom) in heaven. When they release the butterflies, they are sending kisses back up to heaven for Noni. (We had to come up with something after countless little butterflies were losing their lives after getting put in a jar. haha).
Here's come of the colorful pieces of nature they found.
Avery displaying the nature finds.
Jordyn showing off the colorful spread of nature.
Aww...just look at 'em...don't you just want to scoop 'em up and hug and hug and hug on them? :) Well, at least I do. So, there you have it...a couldn't-get-easier-than-this weekend project the whole family can enjoy!!
April 27, 2012
This Stuff Is for the Birds, Err, Dogs
Yay...the weekend has arrived! I suppose that's good. Unfortunately the hubby has to leave for six weeks, but at least I'll have my guard dog on duty! Speaking of the guard dog. I did a little project this afternoon for Gauge (our little-bitty 85 pound puppy that shows his face on here periodically).
I should preface this my quoting myself about 15 years ago: "Mom, who would want to collect children's chairs? I just don't get it. They don't even look cute. I WILL NEVER collect something like that". My Mom had a love for children's chairs. I just didn't get it at the time. Now I am EATING MY WORDS. Who would have thought I, me, myself, moi, would be collecting children's chairs. Well, they have grown on me over the years and now I love them...especially one with a good patina. I'm sure my Mom is in heaven laughing a me and recalling the words I said to her back in the day! Enjoy the laugh, Mom.
So, now here are two of the many children's chairs I have floating around the house.
I wanted to make Gauge a new food and water bowl station. The little guy just seems annoyed that he has to reach his head all the way down to the floor to get his food; so, I figured, why not lift it up. No, he's not spoiled...what would make you think that? I started by buying two stainless bowls at Wal-Mart that had a rim on them. I used a kitchen bowl that I had that matched the size of the top of the bowl (minus the rim, so the bowl would have something to rest on) and drew a circle on each chair. I then drilled a hole in the circle (see on the middle right of the circle below) so that my c-rappy jig-saw would have a place to get started.
Oh yeah, and wear goggles when using the jig-saw...especially if yours is a piece-of-junk-$3-garage-sale-find-that-vibrates-your-entire-body-when-you-use-it-jig-saw. Don't be hating on the
sexy glasses...you know you want some!
The brown chair was a bit taller than the blue chair. I wanted them mismatched on purpose, but wanted it to be a little closer to the height of the blue chair, so I used the circular saw and cut off and inch from each leg.
I also sanded the rough edges the jig-saw left behind.
I waxed both of the chairs with my go-to wax.
Here they are in their new home. Gauge obviously like them okay...he already ate out of his bowl and he's licking his lips here. **Updated: I added felt stickers to the bottom of the feet and a small strip across the top of the back to protect the walls and floor.**
I just love the farmhouse rustic old feel of these and he doesn't seem to mind it either.
And just for kicks...I'll reminisce a bit and share some pics of the little guy over the years. Here he is on the day we got him.
Loving the snow. He used to beg to sleep outside in this stuff.
Aww, he loves his momma most!
The boy is a country dog...what can I say!?!
Linking up with these great parties:
I should preface this my quoting myself about 15 years ago: "Mom, who would want to collect children's chairs? I just don't get it. They don't even look cute. I WILL NEVER collect something like that". My Mom had a love for children's chairs. I just didn't get it at the time. Now I am EATING MY WORDS. Who would have thought I, me, myself, moi, would be collecting children's chairs. Well, they have grown on me over the years and now I love them...especially one with a good patina. I'm sure my Mom is in heaven laughing a me and recalling the words I said to her back in the day! Enjoy the laugh, Mom.
So, now here are two of the many children's chairs I have floating around the house.
I wanted to make Gauge a new food and water bowl station. The little guy just seems annoyed that he has to reach his head all the way down to the floor to get his food; so, I figured, why not lift it up. No, he's not spoiled...what would make you think that? I started by buying two stainless bowls at Wal-Mart that had a rim on them. I used a kitchen bowl that I had that matched the size of the top of the bowl (minus the rim, so the bowl would have something to rest on) and drew a circle on each chair. I then drilled a hole in the circle (see on the middle right of the circle below) so that my c-rappy jig-saw would have a place to get started.
Oh yeah, and wear goggles when using the jig-saw...especially if yours is a piece-of-junk-$3-garage-sale-find-that-vibrates-your-entire-body-when-you-use-it-jig-saw. Don't be hating on the
sexy glasses...you know you want some!
Next, I used the jig-saw to cut out the hole I had previously traced, so the bowl would have a place to sit.
I tested the bowl to make sure it would fit, and sure enough...it worked perfectly.The brown chair was a bit taller than the blue chair. I wanted them mismatched on purpose, but wanted it to be a little closer to the height of the blue chair, so I used the circular saw and cut off and inch from each leg.
I sanded the edges where I had just cut to add back the worn look.
The chair was put together using dowels, but was a bit loose in one area, so I used wood glue and clamped it for a while just to make it a bit more sturdy.
Here they are in their new home. Gauge obviously like them okay...he already ate out of his bowl and he's licking his lips here. **Updated: I added felt stickers to the bottom of the feet and a small strip across the top of the back to protect the walls and floor.**
I just love the farmhouse rustic old feel of these and he doesn't seem to mind it either.
And just for kicks...I'll reminisce a bit and share some pics of the little guy over the years. Here he is on the day we got him.
Loving the snow. He used to beg to sleep outside in this stuff.
Getting bigger and loving his daddy!!
The boy is a country dog...what can I say!?!
Linking up with these great parties:
April 26, 2012
Drab to Fab Table
I just finished a table for a customer of mine this afternoon. I do quite a bit of work for her and she always finds the cutest pieces. She's super creative and talented, so I'm not sure why she doesn't do this herself, but I'm not complaining to have the business! :) I hope you're reading this "J"! LOL.
Here's what the cute little table ended up looking like. She wanted me to paint the base white with a medium distress.
She had picked this piece up recently and used modge-podge to put old postcards, sheet music, etc. on the top. This one was for sale but wasn't flying out so she decided to have me update the drab base into something fabulous.
I used ASCP in Old White. If only there were enough words to say how much time this stuff can really save. I mean seriously...no sanding, no priming....so wonderful! Literally, all I did to this piece was wipe it off with rag to remove dust.
Two coats of chalk paint and a little bit of dry brushing on the top:
Then I distressed using my orbital sander and a 150 grit paper. Again, I don't use this paint for everything, but when it fits the bill, it's certainly worth it. It distresses so perfectly.
I then applied clear wax (I actually used Minwax on this one instead of AS wax). Still gives a super, super smooth and soft, durable finish.
I love the update that this brought to the table. It really transformed it into a bid of a different piece. She picked it up today and was very happy with the look of it. Happy customer = happy me!!
Subscribe to:
Posts (Atom)