Hello Blog Friends! I've got a fairly lengthy post for you due to all the pictures (yep, I finally have some "during" pictures to go along with this tutorial). Yay, for me. Sorry if you're bored to tears looking at all of them.
This is a simple DIY Woodworking/Decor Project for Justin's
Man Cave. Can you call it decor if it's going in the Man Cave? Just doesn't seem to fit. Well, the hubby does have a Man Cave and it's the one room in the house that I have NO say over. In fact, he's given Gauge a lifetime entry pass and I still have to ask for permission to go in there! But then again, who wouldn't give a sweet little face like this a lifetime pass?
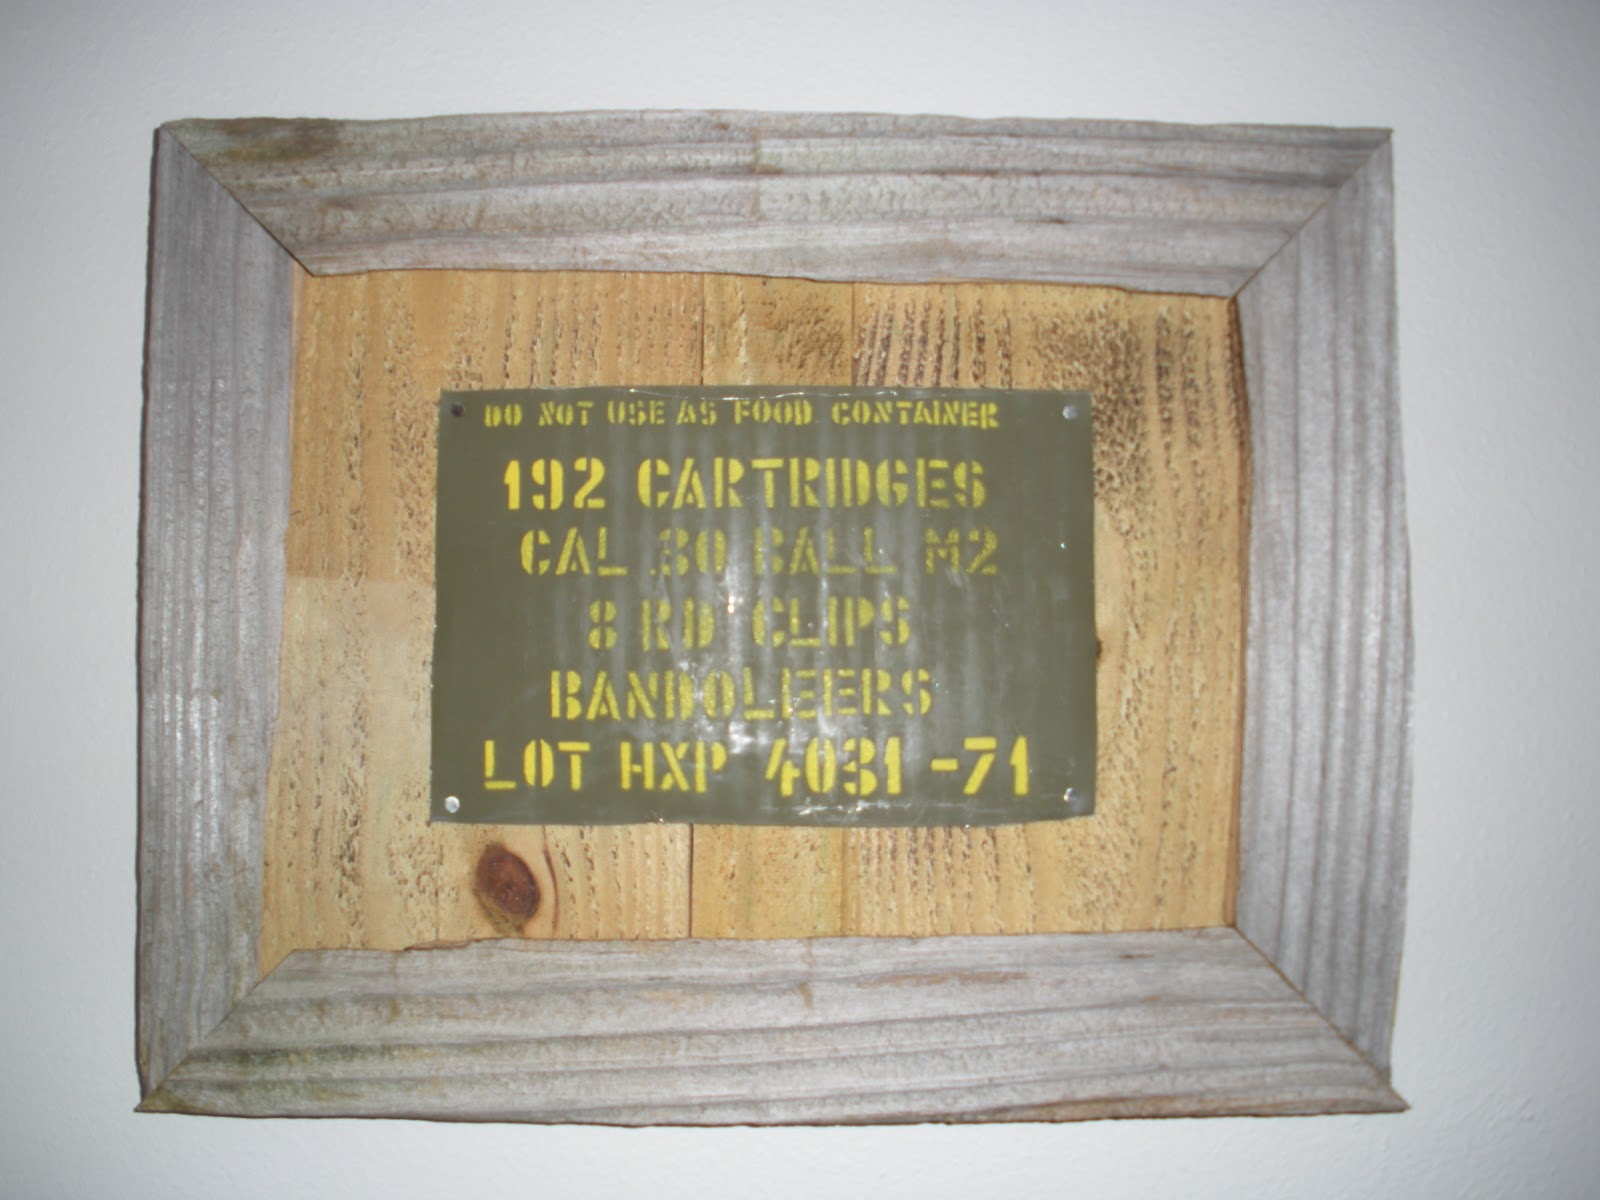
To say that they hubby is obsessed with guns would be an understatement, so it was only fitting that some of his new decor would be made from an old metal ammo container.
Here's what the finished product looks like and I'll give a detailed tutorial below.
First I should probably show you the sign on the door...so, if you decided to actually enter in person to see it, it would be at your on risk! Did I mention that I have no say over this room??!!??
To begin, Justin cut off the front side of the can. BE VERY CAREFUL...it is extremely sharp.
He had to bend a little, cut a little, bend a little, cut a little, and so on.
Here is is after it's cut off...imperfection was the desired result, which meant it didn't have to be cut perfectly (an excuse not be perfect...my favorite!).
For the frame we used some wood from the good 'ol free
pile of wood. Momma don't pass up free wood, so we have a fairly large supply of this kind of good stuff, compliments of the side of the road, aka...someone's trash = my treasure!
Justin laid it out to see about how big he wanted the frame to be. To get the wood piece into smaller widths, he just broke it by hand...it was fairly cracked to start with and there was a perfect crack down the middle.
The angles for the frame were cut using our compound sliding miter saw (Happy Birthday to Justin, Happy Birthday to Me, Happy Valentine's Day, and Happy Anniversary...those are the events we used to purchase this last year). Next, we simply laid the frame out to get a visual.
Justin then cut some lighter colored plank style boards that we had to fit in the frame (it doesn't necessarily have to fit in the frame directly, the frame is actually glued on top of these lighter boards as you will see later, so the measurements don't have to be exact. Once those boards were cut to size, we simply glued them together with wood glue and clamped them together to dry overnight.
Once dry, we were ready to put the frame into place. The smaller lighter colored boards on each side are just to hold the frame up while we were putting it together.
Next, the frame was glued into place.
Then, as any man would do, Justin used fire to achieve a burned look on the lighter colored wood using this little guy.
He then nailed the metal piece from the ammo can onto the framed boards by using a nail in each corner.
There you have it...original Man Cave art!


 .
.


No comments:
Post a Comment